Foam Flowers I cut with my die cutting machine..!
Wednesday, 11 June 2014
Hair bands
This week I worked on a lot of flowers made from Funky foam. These flowers were glue on hair bands to match a Lalaloopsy party..!
Tuesday, 27 May 2014
Sunday, 25 May 2014
Saturday, 24 May 2014
Friday, 14 March 2014
Monday, 24 February 2014
Crafter companion Door hanger..!
This weekend I use some characters from Crafter's Companion to create a door hanger for children's room. It was so funny ! I used Foam with the technique black background, my Spellbinders die cuts (They works so well with the foam) and finally some embellishments.
Thursday, 20 February 2014
Flower pot Decoupage
Clay pots have so many uses and are a fantastic medium for crafts. This decoupage flower pots projects are really inexpensive, simple and fun. There are many uses. I have made some for Candle Holders (for the first Holy Communion of my son), I also made a medium size for a party decoration ( I put some sweets sticks on it) Depending on what you want, you can use coloured tissue paper, stamps, wrapping paper, magazine or greeting cards cut outs, old newspaper .
Actually, anything made of paper is good. It's a great moment to think creatively and enjoy.
This is useful as gift and a home decoration of course..!
I just paint the pot with white acrylic paint for the border I used a gold acrylic paint and after that I paste some cute images. Finally I cover all the piece with mod pogde.
This awesome pot was terrific with the marshmallow sticks..!
This was my cute candle holder!!.
Bits of leftover paper...
Hi! and happy Thursday.
Today, I am sharing one of my favourite tips.
I like to challenge myself to use my leftover stash of bits of paper. After all, I have a bunch of pieces of different sizes of paper that I cannot let go to waste.
When I work with patterned paper, I like to re-think the way I use it. Most of the time, patterned papers are usually used for backgrounds. But with little pieces of different patterns and textures we can find new ways to explore our creativity. I have made single borders. flowers, to combine with buttons and ribbons. Here some examples..
Monday, 17 February 2014
FUNKY FOAM, FOAMY, GOMA EVA.. FOMI
What its Funky Foam Crafts?
Foamy (Funky Foam) Crafts is the art of working a foam commonly known as Funky Foam (Vinyl Acetate Ethylene) Funky foam or Foamy as is known in more than 80 countries. The Foamy is therefore a type Thermoplastic polymer blends with any accessory or product directly or overlapped application. It is a material that does not replace any other known , but on the contrary, it supplements.


Its salient features are:
- Resistance to extreme climatic changes
- Low water absorption
- Is friendly to the environment : it can be recycled or incinerated
- Non-toxic
- It is washable
- Easy to paste, cut and paint .
Foamy Crafts is commonly used in teaching and creative crafts in school work . Globally distributed at stationery stores and arts and crafts in the form of sheets of different colours, as well as in various punched shapes ready to decorate figures. Being a lightweight material , the Funky Foam serves many common interests of creative and professional crafts. Being thermoformed , washable, no sharp , non toxic and being able to paint with us any type of known painting ( chalk , tempera , acrylic , gouache , watercolours, diamond , glossy, volume , waxes, coloured sands , oil , etc . ) Its everyday crafter's favourite art. Also can be applied to any known technique of painting on silk or linen fabrics and pyrography . Another very widespread use is as the material for quilting objects or surfaces , due to elastic and spongy texture.
Tuesday, 28 June 2011
Cover for Notebooks / Libretas


This beautiful project its useful as a gift . The cover can be personalized with the name of the person or his favourite stuff like, animals, professions, hobbies etc.

Techniques used:
Cuadrille, thermoformed, Funky foam décor
Supplies:
Funky foam light green, Dark gren, red, brown, yellow
White glue
Chalk Pastels
Black Sarphie marker extra fine
White gel pen
Ruler
1. - When trimming is best to move the Funky foam not the scissors, so as to achieve a cleaner, easier cutting.
2.- To mark or draw on Funky foam it is recommended to use soft pencils (2B hardness is ideal) . If you do not want to leave any marks you can use wooden sticks to mark.
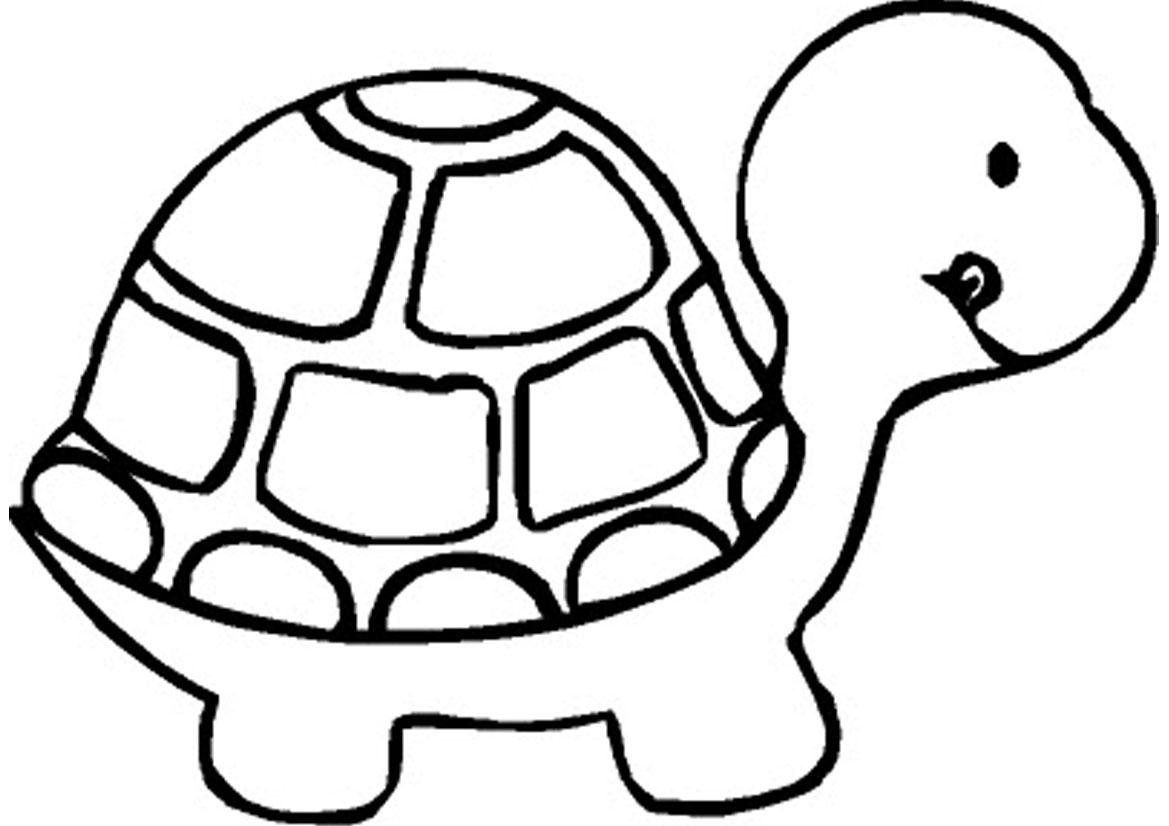
Here he images I used from the web.
Cuadrille Tecnique :
For the Bear
1.- Now cut out the drawing of the bear and transfer it to the brown funky foam using a pencil or a sharpened wooden stick. Be sure to draw the details like eyes, mouth, etc.
2.- Now cut out the funky foam and with the black Sharpie draw the details in the piece. You can add details like pink cheeks with pink pastel and light with the white gel pen.
3. -For the nose cut out a little piece of red funky foam in the shape of the nose and add with a tiny dot of white glue.
For the turtle
1.- Now cut out the drawing of the turtle and transfer to the yellow funky foam using a pencil or a sharpened wooden stick. Be sure of draw the details like eyes, mouth, etc.
2.- Now cut out the funky foam and with the black Sharpie draw the details in the piece. (Don't add details to the shell, because we are going use a dark green funky foam ) You can add details like pink cheeks with pink pastel and light with the white pen gel.
3. -For the shell transfer the drawing (only the shell) to a dark funky foam, be sure to add details and light with white chalk then cut it out and add glue to stick it to the yellow turtle.
Now you can add the turtle and the bear to your notebook cover as you please...!
You can use this techniques for made different kinds of figures as you can see and also you can add details like ribbons and embellishments.
© Artistic Crafts


Funky Foam / Goma Eva
Wednesday, 27 April 2011
Folders
These folder covers were made by wrapping a single sheet of Funky Foam around the folder after that I stuck it to the folder with glue. When its was dry I glued some pieces made with the black background technique including the name..!


Folder made with foam. This folders includes the owner's name and a Pokemon


Folder made with foam. This folders includes the owner's name and a Pokemon
Subscribe to:
Posts (Atom)